week1
Allocation of Roles and Analysis:
In the first week of our project, during our group discussion, we assigned specific roles and responsibilities to each team member. Following this, we established our project requirements and designed the software structure.


Lab Day:
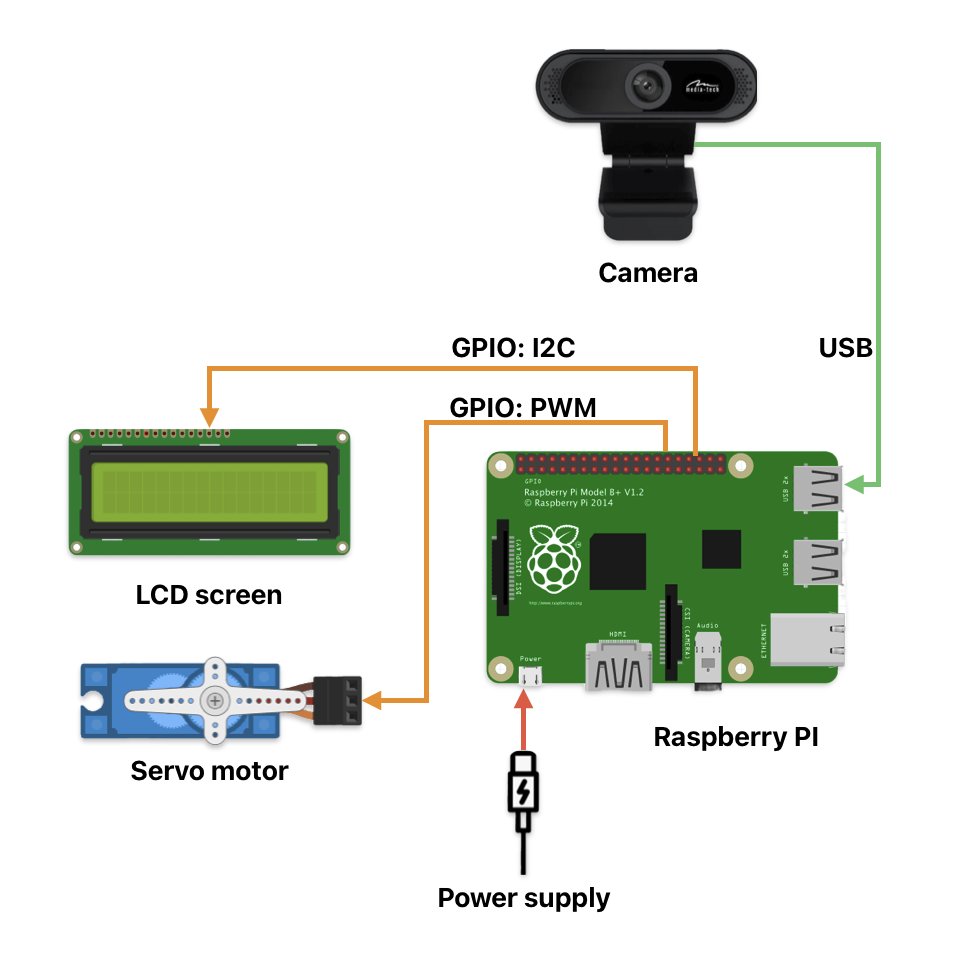
Our task for the day was to gather the necessary components and start the hands-on part of our project. The components list included:


Challenges Encountered:
Missing Components:
We had been informed that the lab would provide a monitor for our project, but unfortunately, they lacked HDMI monitor and a micro HDMI adaptor for our Raspberry Pi. This necessitated an urgent order for a micro HDMI to VGA adaptor.
Servo Motor Issues:
Another technical challenge we faced was with the servo motor. Its continuous rotation feature meant we could not determine the angle of the servo motor. This could added complexity to our design.
next week:
keep coding on lcd and camera detection
build cardboard test cars